Erste Schritte
Medien und Inhalte
Tutorials
Website und Veröffentlichung
Layout und Navigation
Formulare und Dienste
Anleitungen
Stellen Sie einen numerischen Bereich fest, lesen Sie den ausgewählten Wert oder verbinden Sie einen Schieberegler mit einer Animation.
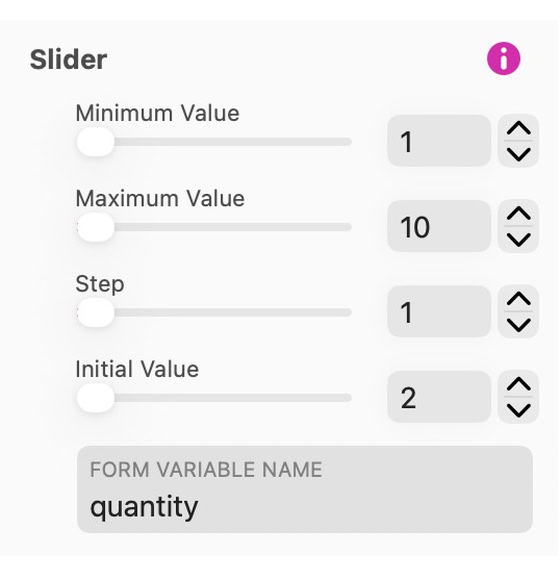
Set the minimum, maximum, step and initial value in the Style inspector and give the slider a variable name. Minimum Value, Maximum Value and Initial Value range from 0 to 10000, and Step from 0.1 to 1000. Style the track with Background (a Fill color or other content such as a gradient or image) and Slider Height > Thickness, plus Border, Rounding and Shadow. The thumb is a separate Slider Thumb inside the slider: select it to give it its own background, border and Background Filters. The example below lets a visitor choose a quantity from 1 to 10, starting at 2.
Quantity
Die Werte werden im Stil-Panel festgelegt, indem Sie den Minimalwert, den Maximalwert, die Schrittweite und den Anfangswert des Schiebereglers definieren. Außerdem vergeben wir dem Schieberegler einen Formularvariablennamen – in diesem Beispiel verwenden wir die Variable quantity. Wenn das Formular gesendet wird, zeigt die E‑Mail den Variablennamen gefolgt vom vom Nutzer ausgewählten Wert. Das sieht in etwa so aus: quantity: 2.
Um anzuzeigen, welche Menge ausgewählt wurde, fügen wir rechts neben dem Schieberegler zusätzlich ein Textfeld hinzu, das die ausgewählte Menge zeigt. Dies wird durch ein Smartfeld im Textfeld erreicht – Sie sehen die Option im Stil-Panel, wenn Ihr Textfeld auf der Arbeitsfläche ausgewählt ist – es sieht so aus:

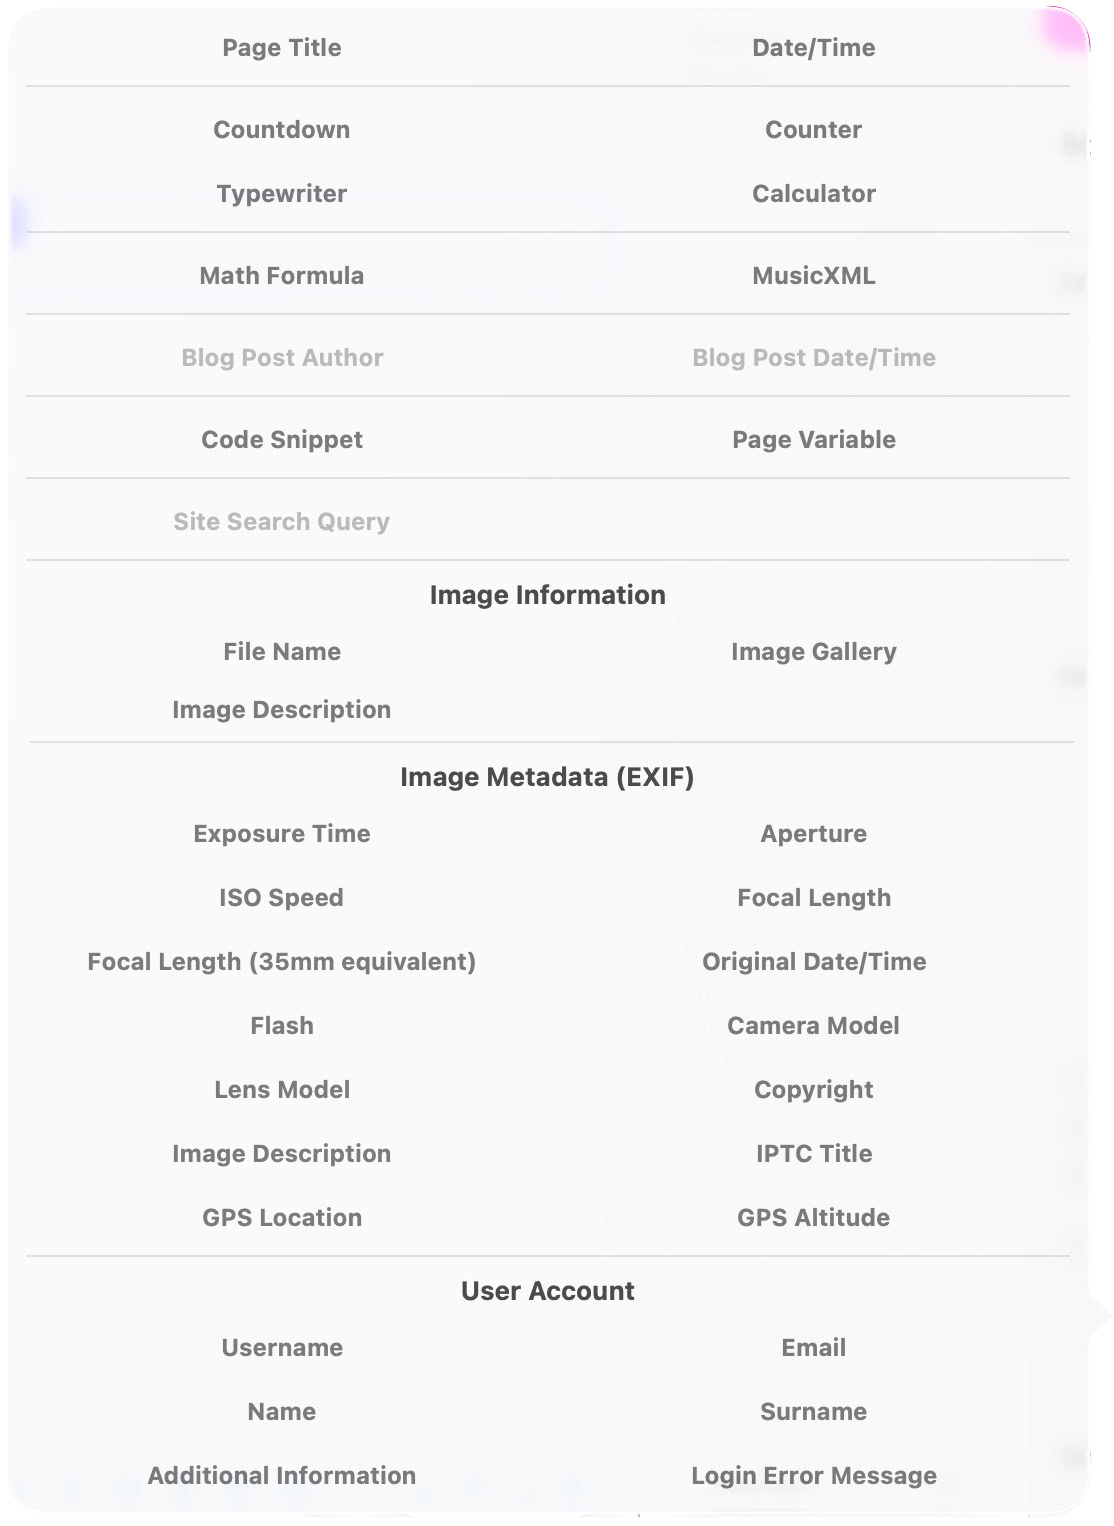
Wenn Sie ein Smartfeld einfügen, wird Ihnen ein Options-Panel angezeigt. In diesem Fall benötigen wir die Option Rechner. Dadurch wird ein Smartfeld vom Typ Rechner in das Textfeld eingesetzt – es sieht so aus:

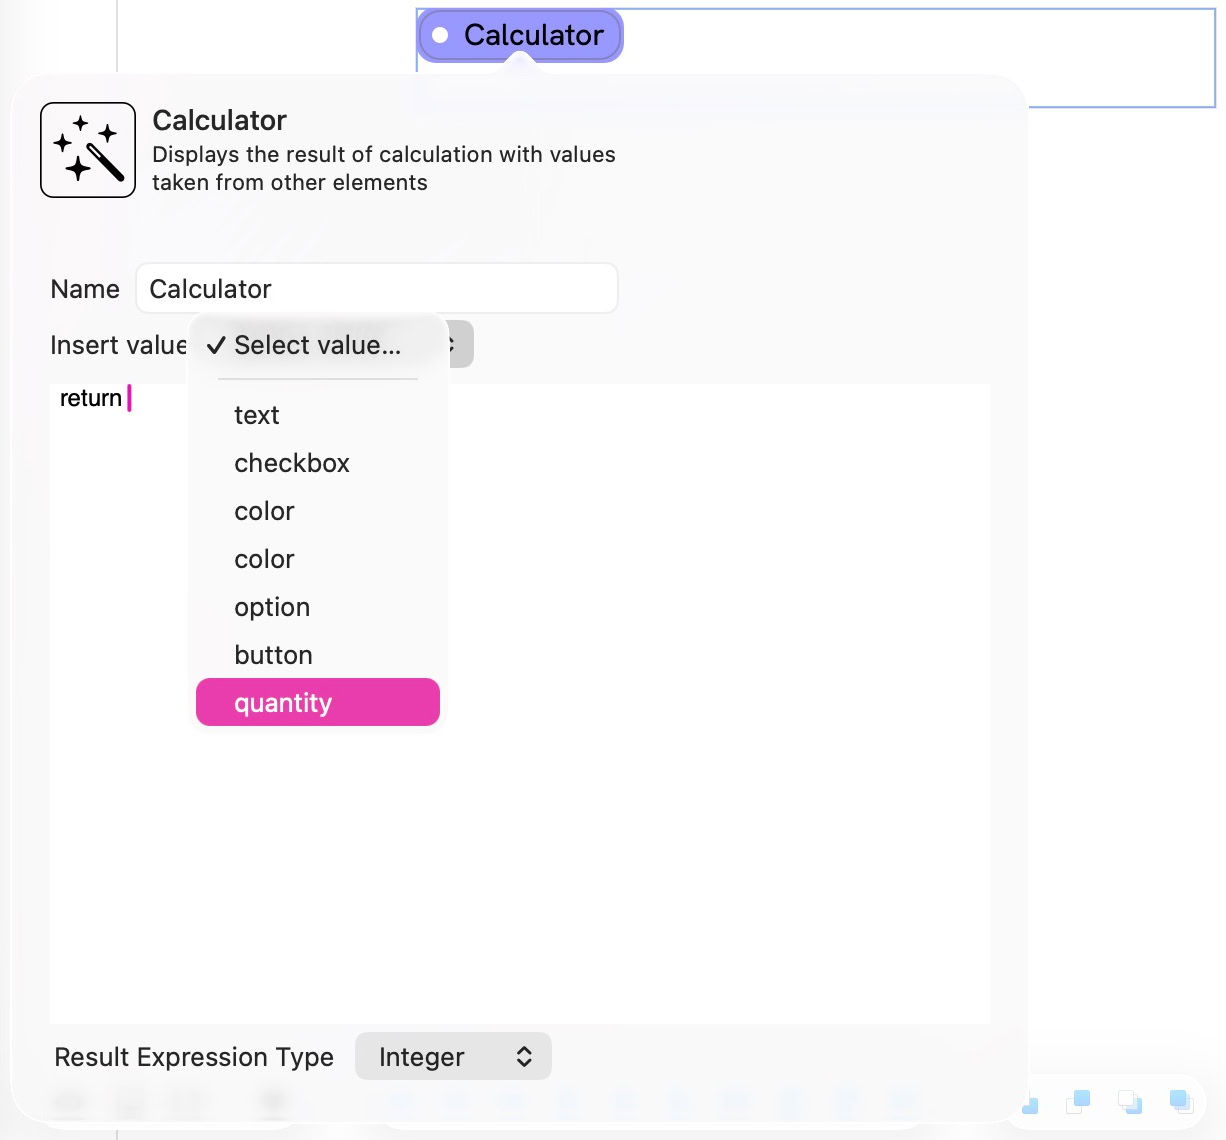
Click on the calculator smart field to set its value. To help you, Sitely looks at your page and finds all the available variables that you can use in your calculated field. In this case, Sitely found our variable quantity attached to the slider. This is the value we need to display next to the slider, so that’s the option chosen. Now, as the slider is moved, the appropriate value is displayed to the user.
Note: We have a whole section in the user documentation for smart fields and their usage. We’ve only deviated to the topic here to show the relevance of smart elements in the context of this particular form element.
A slider can control progress in a Lottie animation or a 3D model animation. Add the slider and the animated element to the same page. Select the animated element, turn on Controlled by Slider and choose the Slider in the inspector; Reverse Direction runs it the other way. Use Reverse Direction to invert the progress. See Lottie Animations and 3D Model.
Verwenden Sie Save Preset im Style-Inspektor, um dieses Erscheinungsbild auf einem anderen Steuerelement desselben Typs wiederzuverwenden.
Siehe Formulare zum Konfigurieren von Einreichung und Lieferung.
Bitte Bericht alle Mängel in dieser Dokumentation und wir werden es so schnell wie möglich beheben!
Aktualisiert für Sitely 8

Leistungsstark und erfrischend einfach, zu Hause auf dem Mac, neue Freiheit auf dem iPad zu finden.
Always on. Keeps the site working.
Enables optional features.
Remembers your settings.
Counts visits and page views.
Tailors ads to your browsing.
We and our partners use optional cookies for extra features, saved preferences, visit counts and personalised ads. To change your choices later, use Cookie settings in the footer.
Closing keeps optional cookies off. Privacy policy